
This is a Veteran Owned site

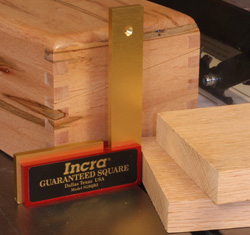 |
Taking the time to prepare your wood accurately BEFORE joinery makes getting tight-fitting, attractive joints much easier. Click image to enlarge |
Perfect Joints Are Not an Accident
Perfect preparation makes perfect joinery possible
Text & photos by Tom Hintz
Posted - 2-17-2010
We all want to make perfect joints that strengthen and enhance the appearance of our projects. However, too many woodworkers rush right by the simple processes that make achieving quality joints possible. All too often the result is compromise and frustrated efforts. As with many things, preparation is the key.
Straight & Square
All joints must be cut into straight, consistent wood for the finished joint to actually fit and the project end up straight and square. If the wood has a slight angle on the ends, that error compounds with each piece of that project. In a box-type project not-quite-square ends make it all but certain that the joints will not seat properly and that the project will rock when placed on a flat surface.
Work pieces with a twist or other deviation over their length also make it very difficult to cut accurate joints. Even if the joints themselves are formed perfectly (not likely), the clamping pressure needed to overcome twists and bows during assembly "build in" huge stresses within the project that may cause joints to fail or the assembly to warp after it is completed.
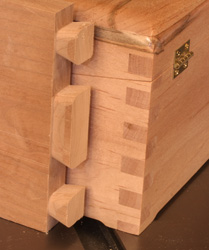 |
Virtually all joint types benefit from consistent, square wood. Click image to enlarge |
Twists or warps can make it all but impossible to cut perfect joints on even the finest of jigs. Very often the clamping mechanisms that secure the wood to the jig are some distance from the joint area to allow clearance for routers or other cutting tools. While the wood may be held flat at the clamping point, the end where the joint is actually being cut can be misaligned sufficiently to make it impossible to cut a joint that closes or aligns as it is supposed to. I have worked with far too many woodworkers that were frustrated with an expensive jig when it was actually badly prepared wood that was causing their problems.
Consistency & Parallelism
An often-overlooked wood dimension is its thickness. For many joint types all of the pieces must be identical in thickness. Some joint types allow you to intentionally use different thickness pieces of wood but those must also be consistent in thickness from one end to the other. Early on I realized how inconsistent wood thickness was frustrating my joinery attempts. I added a good thickness planer to my shop so that I could accurately thickness the wood I was using in my projects and my joinery suddenly got better. Everything from rabbet joints to dovetails instantly fit much better even though I was doing nothing new aside from thicknessing my project wood.
Along with consistent thickness, having parallel edges is also important to achieving the perfect joint. If the edges are not parallel it is virtually impossible to cut a consistently square end on which to base joinery. You might be able to hide some parallelism deficiencies with butt or rabbet style joints but cut nearly any of the interlocking joint styles such as dovetails into work pieces that do not have parallel edges and the frustration can drive you nuts.
Even consistency in the length of project parts is crucial to virtually all forms of joinery. If the sides of a square box are not precisely cut to the same length there is no way to have it come out perfectly square. Rectangular boxes also need to have opposing sides cut to precisely equal lengths. Even small variances in component length within a project can also make it very difficult for many types of joinery to close properly without distorting the project shape in the process.
 |
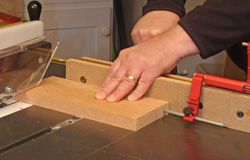 |
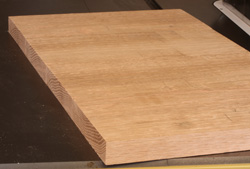
All four of these work pieces (left) went through my thickness planer and are exactly the same thickness from end to end and from piece to piece. Just as important is cutting pieces to the exact length. I use a this work stop (right) on my Incra 1000SE miter gauge to be sure all of the piece this size are exactly alike. Click images to enlarge |
|
To insure perfect lengths I always cut my work pieces using a gauge block or work stop that can be adjusted to the length I want. Then cutting all similarly sized work pieces using that work stop or block to position the cuts insures identical length parts. This is a fast, easy setup that can have a tremendous impact on your projects overall, not just in terms of the joinery.
Helping Yourself
When getting ready to cut the work pieces for your next project take the time to be sure your tools are properly aligned so they make true, square cuts. Spending a little time checking the tools and then setting them up correctly can save huge amounts of time and frustration later in the project. You can also save money with good preparation by eliminating wood that would have been wasted in the search for a compromise joint fit that still is not right.
Jointing one wide face and an edge is always where I start on my project pieces. After that I go to the planer to insure consistent thickness and then to the table saw to cut an edge parallel to the one I jointed earlier. Then one cleanup pass on the jointer on the freshly sawn edge and my parts are ready. Then I can concentrate on cutting clean, perfect fitting joints that help my projects look and perform at their best.
Have a comment on this story? - Email Me
All written, photographic and drawn materials are property of and copyright by NewWoodworker.com LLC 2000-2019. Materials may not be used in any way without the written permission of the owner.