
This is a Veteran Owned site

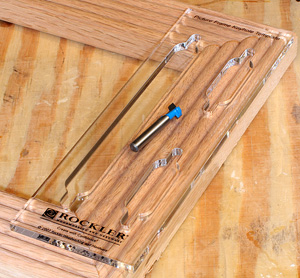 |
This is a simple-looking template that saves tons of frustration and chewed up wood. the bang-for-the-buck quotient is very high with this tool. Click image to enlarge |
Rockler Picture Hanging Keyhole Slot Template
Making what should be a simple cut simple in the real world
Text, photos and video by Tom Hintz
Posted – 5-2-2013
One of the most basic ways of hanging objects like picture frames has been the keyhole slot that engages the heads of a couple screws to hang the object on a wall. This cut is made with a special router bit such as Rockler’s 3/8”, ¼”-shank (#92024) that is equipped with carbide cutting edges. The bit is plunged into the wood to create the round hole that accepts the head of the screw but is then moved in a straight line to cut the t-shaped slot that secures the screw head and thereby the object being hung. That moving the router straight part is where the wheels generally come off for woodworkers.
Keeping the router moving in a straight line and putting the keyhole slot where we want it has always been difficult. Since many hanging objects need two points of support we have to cut two of these slots where we really need them which is even more complicated. Enter Rockler with their Picture Hanging Keyhole Slot Template (#32884) that works with the bit mentioned above and a 5/8”-diameter guide bushing (#38756) and this part of our woodworking life just got better.
The Basics
 |
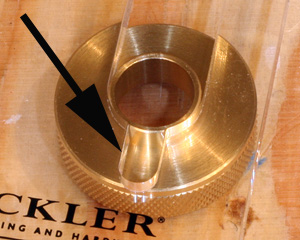 |
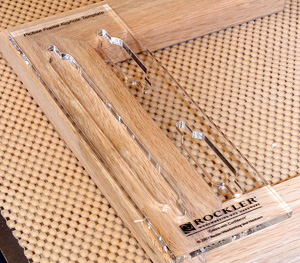
The Rockler Picture Hanging Keyhole Slot Template (left) has three openings, two short ones for each upper corner of a picture frame and a long one that can be cut across the top of a large frame in two places to allow for horizontal corrections. The narrow gap at the end of the openings (right) is a dust escape that helps let the bushing and bit travel fully in the cutout. Click images to enlarge |
|
The Rockler Picture Hanging Keyhole Slot Template is made from ¼”-thick clear acrylic that makes aligning it to layout marks simple. This template is most often stuck in place with double-sided tape. The template itself is 3”-wide by 9”-long and has one 6-1/8"-long slot and two that are 1-7/8"-long. There are narrow slots at each end of the guide bushing openings to provide an escape for dust as you route. (Nice touch!)
Even the size, shape and layout of the Rockler Picture Hanging Keyhole Slot Template have purpose. Align either corner of the template to the corner of a picture frame and you cut perfect keyhole slots in precisely the same position in both corners. The longer slot in the template lets you cut long slots for when the ability to adjust horizontal positioning is important.
In the Shop
The Rockler Picture Hanging Keyhole Slot Template comes with the protective paper backing still on the underside so I removed that before applying strips of double-sided tape. I used the corners of the Rockler Picture Hanging Keyhole Slot Template to locate the routing in each corner of the frame. After sticking the template in place I installed the Rockler 5/8” guide bushing and the keyhole router bit in my plunge router. I suppose it is possible to do this with a fixed base router but that means having to tip the bit into the wood and I do not consider that a safe way of doing things.
You will note that the cutter on the shaft of the bit only extends up the shank about ¼” so this limits the depth of the cut. I adjusted the plunged depth so that the end of the carbide cutter was just covered by the routers baseplate to insure a complete cut. I made a test cut in some scrap using a straight edge as a guide. I just wanted to be sure that the bit was making a full cut and leaving a clean edge at the surface of the wood.
 |
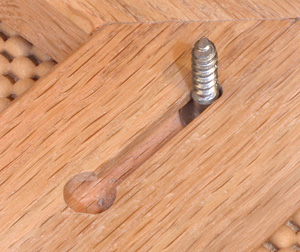 |
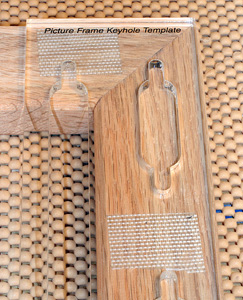
I used a couple pieces of plain double-sided tape to secure the Rockler Picture Hanging Keyhole Slot Template (left) to the wood for routing. The result of using this template is perfectly shaped and placed (right) keyhole slots. Click images to enlarge |
|
Actually routing the keyhole slot is simple. Place the bushing in the slot, move the router to your chosen starting spot for the length slot you want to create. Start the router and carefully plunge it to its cutting depth and then slowly slide the router to the end of the template opening. Because the keyhole slot is so confined you might have to go back and forth a time or two or even go back to the starting position to release the plunge mechanism and retract the bit through the initial hole. It is a very good idea to shut the router off and wait for the bit to stop before retracting the bit5 from the hole. Make sure that dust had not built up in the template or hole enough to limit the cut and clean it out if necessary. Carefully recut the slot if necessary to get the full length needed. Repeat the process with the Rockler Picture Hanging Keyhole Slot Template (turned 180-degrees to get the same spacing) aligned with the other corner.
That really is all there is to it. The bushing and template handle the tough part of this operation leaving you to control the feed rate. The biggest error here could be forgetting what kind of bit you are using and releasing the plunge mechanism somewhere during the cut. Fortunately most of us have that error burned into our brains after messing up like that once.
Conclusions
The Rockler Picture Hanging Keyhole Slot Template is an easy to use tool that makes cutting these keyhole slots easy. Perhaps even more importantly it makes cutting slots on either side of a picture frame in the same place simple. That means you wind up with level pictures and other hangings the first time!
The Rockler Picture Hanging Keyhole Slot Template costs just $11.59 (4-29-2013) which makes using it not only smart but cost-effective as well. This combination of function and value don’t come along all that often in woodworking.
Video Tour |
Visit the Rockler Picture Hanging Keyhole Slot Template Product page - Click Here
Have a comment on this story? - Email Me!
All written, photographic and drawn materials are property of and copyright by NewWoodworker.com LLC 2000-2019. Materials may not be used in any way without the written permission of the owner.