
This is a Veteran Owned site

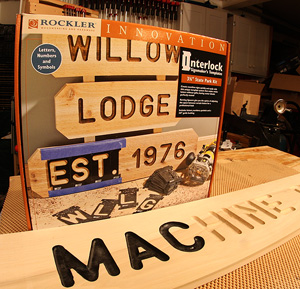 |
This kit gives you all of the templates you need plus kerning to make your signs look right! Click image to enlarge |
Rockler Interlock Signmaker's Templates - State Park Font Kits
Yes, you can make signs that look right!
Text, photos and video by Tom Hintz
Posted – 1-16-2013
Making signs seems like a natural offshoot of hobby level woodworking but many who have tried it wind up frustrated. Sure there are letter templates available but using most of them produced words that looked odd, like something was missing. What was missing is kerning, the proper spacing of letters in relation to each other. The shape of many letters just does not look right when all letters are spaced uniformly and learning which combinations of letters need what spacing is no fun. This is a crucial part of Signmaking 101 that does not come in most template boxes. However the Rockler Interlock Signmaker's Template system has kerning built in which makes your signs look far more professional and they can be easier to read.
The Basics
The Rockler Interlocking Sign Making Templates are made from heavy-gauge 3/32”-thick plastic with the openings sized to capture and guide the brass PC-style collar that is included. The Rockler Interlock Signmaker's Template Kit is available with 2-1/4”-tall letters or 3-3/8”-tall letters. The 2-1/4" Kit (#48356) requires a 3/8" Signmaker's Carbide Router Bit (36676, sold separately) and the 3-3/8" Kit (#43820) uses a 5/8" Signmaker's Carbide Router Bit (32443, sold separately) with both having ¼”-diameter shanks and should be used in a plunge router.
Each kit comes with 99 template pieces and a brass guide bushing. You get letters: (all caps) A, A, B, C, D, E, E, F, G, H, I, I, J, K, L, L, M, M, N, N, O, O, P, P, Q, R, R, S, S, T, T, U, V, W, X, Y, Z. The numbers: 1, 1, 2, 2, 3, 3, 4, 4, 5, 5, 6, 6, 7, 7, 8, 8, 9, 9, 0, 0 and the punctuation /symbols: !, @, #, $, ', ?, ., /, &. Because of how the individual templates connect it is easy to move a letter to another position if you run short of any single letter template. Spacers are included to make this easy.
 |
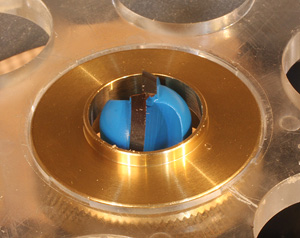 |
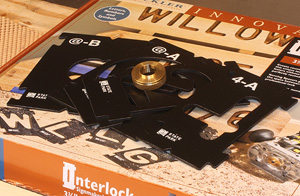
The kit gives you plenty of letter templates (left) plus a nice brass collar designed for these templates. All you need to buy is the signmakers bit (right) like this one from Rockler that worked great during our testing. Click images to enlarge |
|
The Rockler Interlock Signmaker's Template includes special Kerning Spacers that allow you to maintain proper spacing of letter combinations that actually overlap each other slightly. For example, the letters TAT in a word like STATE have this overlap where the T on either side of the A protrude into the upper A space just as the lower arms of the A extend into lower T spaces. Special spacers allow you to cut these letters individually by simply replacing one or more letters with a spacer, routing the surrounding letters then replacing the spacer with the letter to fill in the gap with proper Kerning. The instructions cover this process in detail.
To make this even easier Rockler has something called a Signmaking Wizard on Rockler.com where you can enter the words that make up your sign. The Wizard then produces a diagram that shows what spacers and letters go where for each needed pass to complete your sign. It just does not get any easier. See the link at the end of this review to give the Signmaking Wizard a test drive.
Some letters are impossible to cut in one pass. Letters such as O, P, and R have “islands” that prevent using a single template. In these cases the Rockler Interlock Signmaker's Template provides multiple templates that are used in a sequence that lets you cut cleanly shaped letters in multiple passes with no seams or gaps. The templates index to each other and to V-cuts at the top and bottom to insure that you get them perfectly aligned for all of the cuts.
The Rockler Interlock Signmaker's Templates are secured to the wood with double-sided tape or are simply taped in place. I found that good double-sided tape worked easiest to me. That also made it easier to replace spacers and multi-pass templates.
I installed a Rockler 5/8" Signmaker's Carbide Router Bit (32443, sold separately) in my plunge router along with the included brass guide collar. I set the bit depth below the bushing to about 3/8”. Then I went to the Rockler Signmaking Wizard and printed out a set of instructions for MACHINE PARKING, the sign I wanted to make.
 |
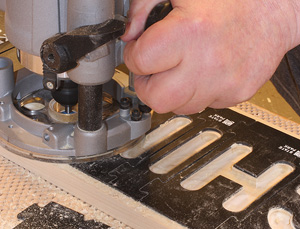 |
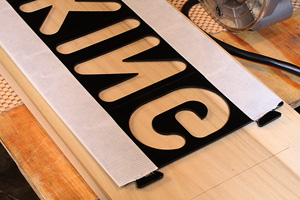
Double stick tape (left) can be used to secure the templates or they can be taped to the wood. All that remains is routing (right) them out. Click images to enlarge |
|
After laying out all of the sign components as listed on the Rockler Signmaking Wizard printout I snapped the templates together for the first pass. I flipped that assembly upside down and applied a strip of two-sided tape to both long edges. I always use good quality double-stick tape for something like this because I learned the hard way that the cheap brands hold best when you don’t care and I care about this sign so I used the good stuff. After pressing the assembled templates in place I was ready to make the first pass.
Even with a baseplate with large holes in it the grooves that form the letters tend to get packed with dust. I found it easiest to just route the first pass as well as I could, shut the router off and clean the letters out with the dust collector hose, then run over the letters with the router again to clean them up. I tried just digging the dust out with my fingers but that is time and labor intensive.
After the first pass I had to change some of the templates and found that a clean spackling knife worked well at separating the templates from the double-sided tape. You have to be careful and lift the letters with the spackling knife, especially where the templates are narrow but they come up easy enough once you get them started.
After completing all of the passes listed on the Rockler Signmaking Wizard sheet I removed all of the templates. Sure enough, all of the letters were fully formed and the spacing looks nice. The edges of the letters had just a bit of fraying in places but nothing a little cleanup sanding didn’t fix quickly.
The sign made in this review will remain indoors so I will highlight the letters themselves with a darker color painted in and then lightly sand the surface to clean up the places where the paint escaped the routed grooves.
Conclusions
Video Tour |
If you want to make signs the Rockler Interlock Signmaker's Template is a must see. Between the easy to use templates, solid instructions and the Signmaking Wizard that is programmed for these templates making good looking signs with proper kerning is easier than you would think.
With a street price of just $79.99 (1-15-2013) for the 3-3/8”-tall set and $49.99 for the 2-1/4”-tall set getting ready to make signs won’t break the bank either. Remember that the kit comes with a high quality brass guide bushing designed for this purpose so all you need is a bit!
Click Here to see the Signmaking Wizard.
Click Here to see the Rockler Interlock Signmaker's Template page of their site.
Have a comment on this Tool Review? – Email Me!
All written, photographic and drawn materials are property of and copyright by NewWoodworker.com LLC 2000-2019. Materials may not be used in any way without the written permission of the owner.