
This is a Veteran Owned site
| | ||||||||||||||
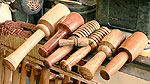
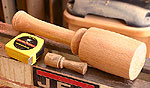
Turning a Carvers MalletLetting the wood helpText & Photos by Tom Hintz The one-piece carvers mallet is a great project for new woodturners because in its simple forms it is easy to turn but provides good practice with basic turning tools and skills. Start out with simple shapes to build confidence and skills before adding more difficult design elements to increase the challenge at your own pace.
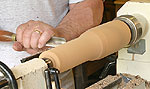
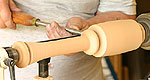
Rough the Blank Mount the blank securely between centers, set the lathe on a low speed and turn it down to a basic cylinder. I have learned to stop as soon as the blank rounds out to look at the wood. Sometimes defects or grain patterns revealed during rounding a blank makes one end better suited for the mallet head and the other for the handle. The blank used for this story was a glue-up that had a shallow gap along part of the seam that was easily turned away, but made that end most appropriate for the handle.
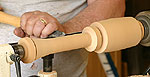
Mark-Off Segments With the blank roughly shaped, you can mark where the various features of the mallet are going to begin and end. I used a large skew chisel to make V-grooves defining the head and the handle areas. Shape the Head Using the large skew chisel, I shaped the curved face of the mallet head. I also began shaping the ends of the mallet head by cutting a gentle angle with the skew.
The lower side of the bead was also rough-shaped to begin forming the junction between it and the handle surface. Shape the HandleI used the roughing gouge and then the large skew to take the handle down to near finish diameter. I like to work the basic shape of the handle in with the roughing gouge to remove material quickly and then switch to the large skew to refine the handle shape and smooth the surface. As the handle approached finish diameter the bead is also refined to keep the junction between it and the handle clean. Refine Shapes
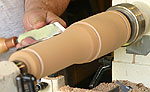
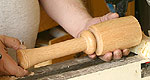
Using skews and spindle gouges, finish cuts were taken on the entire mallet. At this point, all of the shapes are given final cuts to smooth their surfaces and reduce the amount of sanding necessary. Trim Ends With all the chisel work complete I used a parting tool to reduce the material supporting the mallet to about 3/8"-diameter. The wood looked and sounded solid at both ends so this should be enough material to hold a mallet of this size during finishing. Sand & Finish Because of the finish left by the skew and spindle tools, I was able to start sanding with 220-grit and quickly work down to a 600-grit finish. Parting Off and Clean Up
If parting the finished piece off a spinning lathe is at all threatening, remove the piece and saw the waste off the ends. A sharp knife cleaned up the remaining strands of wood. A little sanding prepared the ends for touch up waxing followed by hand buffing and the mallet was done. The process of roughing the blank in stages to pick where features can best be located sounds more time-consuming than it really is. Once you get used to it, and gain a bit of confidence with the roughing tools, blanks can be brought to rough shape very quickly. Being able to actually see the grain and defects as they are revealed allows for making better decisions on what feature should go where, regardless of the project. These options are not always available, but when they are, this process allows taking full advantage of what the wood offers.
If you are new to turning, start with simple designs and then add features one at a time as your confidence and skills grow. You will be surprised at how fast the complexity of mallets and your comfort-level making them increases. |
||||||||||||||
Do you have a comment about this page? - Email Me!
|
All written, photographic and drawn materials are property of and copyright by NewWoodworker.com LLC 2000-2019. Materials may not be used in any way without the written permission of the owner.