
This is a Veteran Owned site

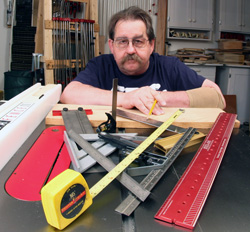
Cut LinesLittle Errors Can Mean Big ProblemsText, photos and video by Tom Hintz Updated = 9-11-2011 We begin each project by marking and cutting wood. While using high quality measuring and marking tools is important, seemingly minor errors in how we use them can lead to ill-fitting joints, miss alignments and out-of-square projects. Logic suggests that we should use a marking tool that makes a mark the exact width of our saw blade. That way we could align the blade on that mark and never accidentally cut on the good side rather than the waste side. That sounds good but it just is not practical. Using good technique every time we cut wood along with a sharp pencil and quality layout tools will always be the best bet. Measuring ToolsMistakes in how we use tools to lay out cut lines can be partially responsible for errors in the dimensions of the pieces we are cutting. A case in point is the metal tape measure, erroneously considered notorious for loosening tips. Most tape measures do come with tips that are loose - but for a reason. The tips are designed to slide in and out to compensate for the thickness of the tip itself. When holding the end of the tape against an object, like when measuring the inside of a box, the tip slides in so the markings are correct.When the tip is hooked over the end of a board, the tip slides out a specific amount (equal to it's thickness) so the markings are again correct.The problem comes when the user attempts to fix the loose end piece or tries to compensate for its movement. This one miss understanding has given more woodworkers fits than just about anything else.
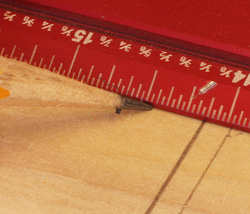
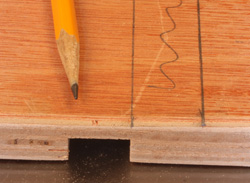
To eliminate these errors, some start their measurement at the one-inch mark, and then add an inch to the reading at the other end. Sound easy to get confused? You bet. The "start at one, add one" system has another drawback. If the piece being measured is more than several inches long, keeping the one-inch mark at the beginning of the board while trying to mark a cut line farther down the piece accurately is all but impossible. You may be able to do this accurately, every time--I can't. Whenever possible, I use combination squares or metal rules and yardsticks to lay out cut lines. Cut Line IndicatorsOne way to help prevent cutting errors is to incorporate an indicator into your cut line that identifies the good and waste sides of the mark. This is not a new trick, but a valuable one if applied consistently. I always add a short wavy line just to the waste side of my cut lines. Some woodworkers finish their cut lines with a small "tail" that always runs toward the good side of the cut line, others towards the waste side. Whatever method you use, whichever way you point it, learn to do it the same way every time. When marking angle cuts, many woodworkers make a small mark indicating where the cut is to be made, but add another indicating how the angle should be cut. Adding this second mark will save time and wood. I promise, if you do not indicate the direction of the angle, you will make a mistake. It happens to everyone.
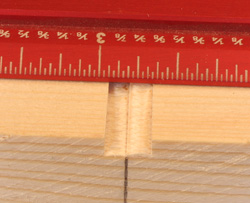
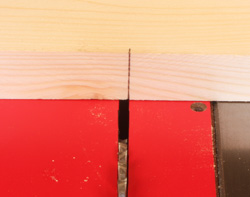
Line DecisionsAfter the cut line is placed correctly, there remains ample opportunity to mess things up. Do you cut on the line? To the left of the line? The right? Split the line? Picking the wrong option for the situation may be only slightly worse than settling for hitting the line at random. To insure the best results in our projects, we have to make all of our cuts accurately, and forcing yourself to make them the same way each time is the best way to be consistent. Let's say you lay out a pencil line 30 inches from the end of a board. If hitting the line with some portion of a standard 1/8-inch-wide blade is close enough, you have a bit over ¼-inch of possible error. In the photo above you can see how wide of a gap can be cut without ever leaving the cut line. The small ridge in the center of the cut out space represents part of the lay out line. I was able to put the blade to the left and right of the layout line center. Another common practice is using one piece of wood as a gauge to mark others meant to be identical in length. In this case, we know the entire line is actually in the waste portion. To get the most accurate cut we need to take the whole line, running the edge of the blade down the edge (good side) of the line. No Cut Line
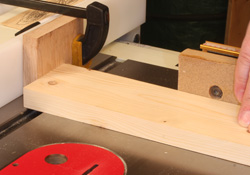
When making a number of identical pieces, the easiest cut line to hit is one we do not make at all. Using a gauge block (see our story on this technique) takes just a little longer to set up, but makes this operation much faster, and very accurate. The down side is that this technique is usually used on a table saw though can be adapted to most miter saws as well. Some lengths can be safely cut on a table saw by installing an extended miter fence with a stop block attached at the correct place. The overall length of the work piece must be large enough to be cut safely. If the work piece is too large, they can be hard to handle on the table saw, making the operation dangerous. Cutting AidesThere are no magic devices that make hitting a cut line exactly where you need automatic. There are a couple techniques that can help a bunch. The biggest issue is teaching yourself to use good technique every time even if it is not the fastest way.
Using the miter gauge on the table saw can be difficult because of the blade meeting the wood from the underside. The good news here is that most of us can see over the wood enough to align a cut line if need be. A little practice with a zero clearance insert along with making clear cut lines can go a long way to improving your projects through properly sized pieces. Learning to cut on marking lines accurately takes practice and a bit of discipline. If you can get yourself in the habit of using the same techniques the same ay every time you make a cut accuracy improves rapidly. As this skill improves, the fit and finish of your projects gets better as well. Related Story |
||||||||||||||||
Do you have a comment about this page? - Email Me! Back to the Tips & Tricks List
|
||||||||||||||||

All written, photographic and drawn materials are property of and copyright by NewWoodworker.com LLC 2000-2019. Materials may not be used in any way without the written permission of the owner.